Build a privacy-safe home network using Pi-hole
Data privacy, and the usage of collected data have now became a controversial subject. People tends to acknowledge more and more the importance of keeping private data; and private life … well … private.
In this tutorial, you’ll see what solution I came around keeping my own privacy at my home network.
What is Pi-hole?
Pi-hole, as they describe themselves, is an open-source DNS sinkhole. It is a custom DNS; that will drop request during the DNS resolution step if it’s been blacklisted.
The main advantage of dropping request at DNS resolution step is that the request never leave your own network: It is first sent to your Raspberry Pi, and then dropped immediately if it’s been blacklisted.
It means that blacklisted remote servers never have to know that you even exist! The ad are dropped before even loading, and not at rendering time, granting your network better performances.
Of course, some ad-based blacklist are provided, making Pi-hole a powerful and untraceable ad-blocker.
Setting up your Raspberry Pi
This step if optional, but it’s always good to start with a fresh install. You can, of course, skip immediately to Pi-hole installation.
Raspbian Stretch installation
Download the latest release of Raspbian Stretch on your disk. Then, we need to copy it on your SD card, properly.
On macOS, It can be done with the following commands.
diskutil list # Note the number associated with your SD card. (ie disk2 for instance)
diskutil unmountDisk /dev/disk2
sudo dd bs=1m if=raspbian-stretch-lite.img of=/dev/rdisk2 conv=sync
We then need to enable SSH before plugging the SD card in the Raspberry for the first boot:
cd /Volumes/boot/
touch ssh
And we unmount the disk
cd ~
diskutil unmountDisk /dev/disk2
Now, you can plug your SD card in your Raspberry and wait it to boot.
You may now connect to it using SSH:
Default password is raspberry
Minimal security settings
The bare minimum to do when the Raspberry first start is to change the password for the pi user.
passwdYou may also want to:
- create your own user with sudo auth, and then delete the pi user
- change the SSH port
- Authenticate using a private key
- Requiring a password when using
sudo - Update the repositories and packages
Installing Pi-hole
It is advised that your Raspberry Pi should have a static IP on your network.
From your Raspberry, you can run the installer by executing:
wget -O basic-install.sh https://install.pi-hole.net
sudo bash basic-install.sh
The installation should guide you through the process. When prompted to validate the IP as a static IP, say yes; and always make sure that the IP is effectively static in order to work.
At the end of the installation process, the administration password will be prompted to you if you choose to install the web administration interface, along with lighttp.
It’s, of course, recommended to change it using sudo pihole -a -p
You then need to set up the static IP of your Raspberry as your primary DNS server on your router. If you can’t, it’s still possible to use the Raspberry as your main DHCP server. (Disable your old one if you choose this option).
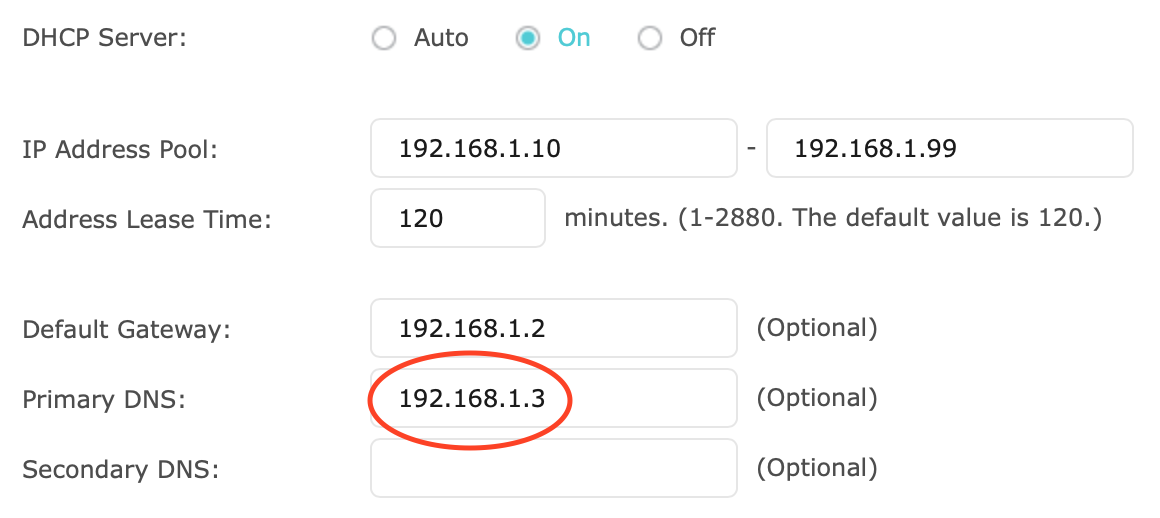
An example of setting my Rapsberry as a primary DNS server on my router
You may now use the internet with no ads or trackers!
Customize your network with aliases
You can, if you want, create aliases to communicate more easily with your devices associated with a static IP.
Let’s say you want to use box.lan instead of 192.168.1.1 or pi.lan instead of 192.168.1.x.
To do so, you need to create an alias file:
sudo nano /etc/pihole/lan.confContaining, for our example:
# /etc/pihole/lan.conf
192.168.1.1 box.lan
192.168.1.2 router.lan
192.168.1.3 pi.lan
Then, add this configuration file to dnsmasq, and reload it
echo "addn-hosts=/etc/pihole/lan.list" | sudo tee /etc/dnsmasq.d/02-lan.conf
sudo pihole restartdns
Using the web admin to check your traffic
Once Pi-hole is enabled, you can access http://pi.hole.
To have access to a lot of more infos, you may login with the password you have set during installation.
If you forgot your password already, you can reset it easily using sudo pihole -a -p (I know, I repeat myself!)
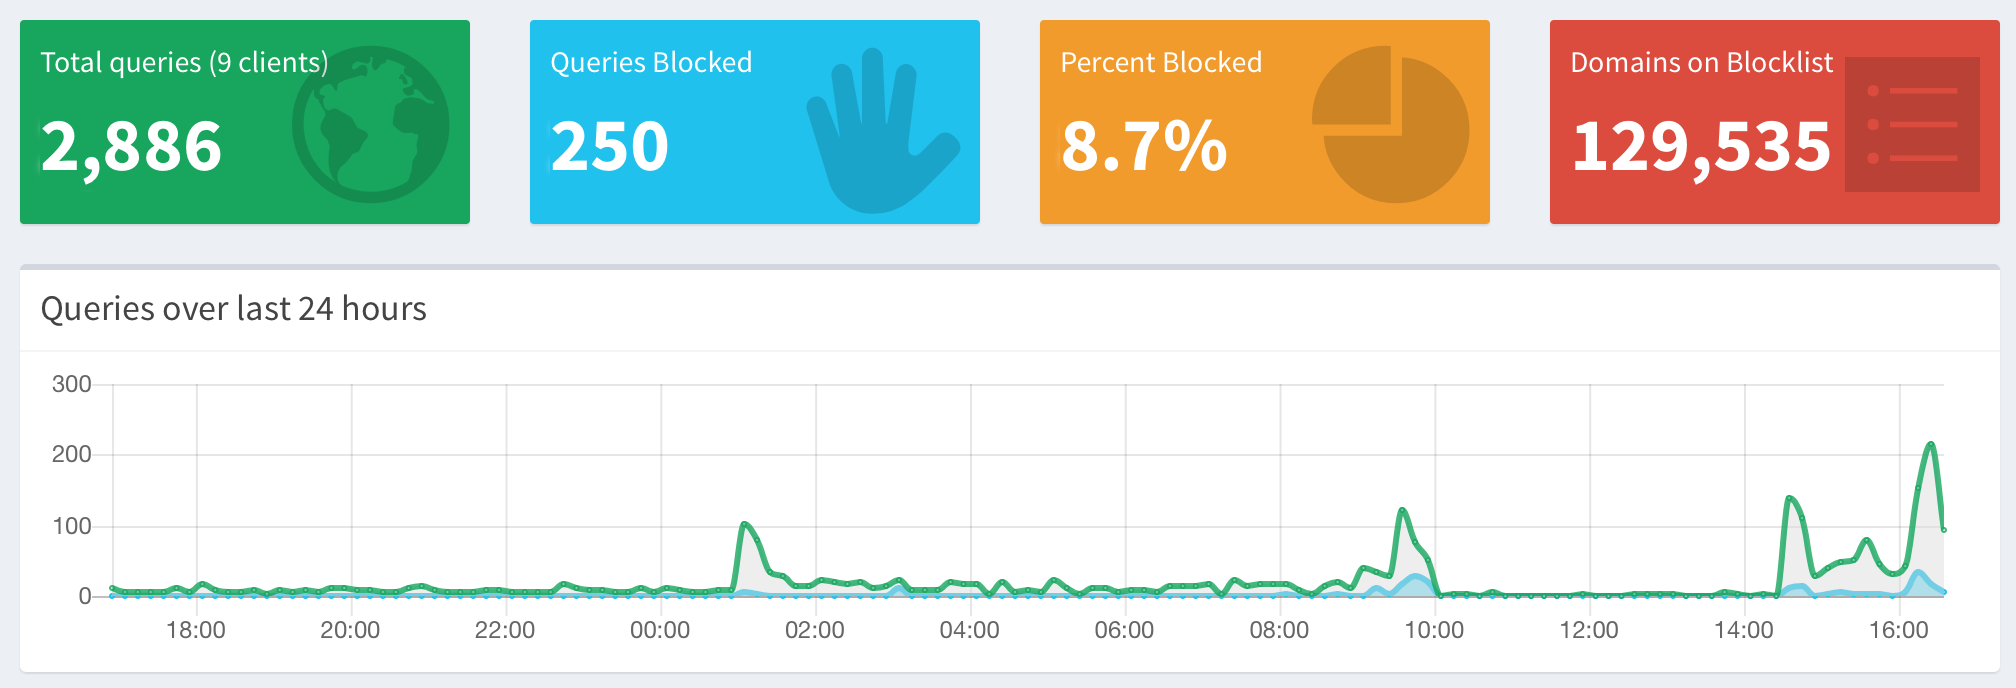
You’ll see the top blocked domains, and the most recent requests.

If you don’t want to track your network that much, you may want to change privacy level mode in the settings.
By regularly check the requests that have been blocked, and the one that are allowed, you’ll be able to whitelist some request you don’t mind see go threw, and blacklist the one that looks shady.
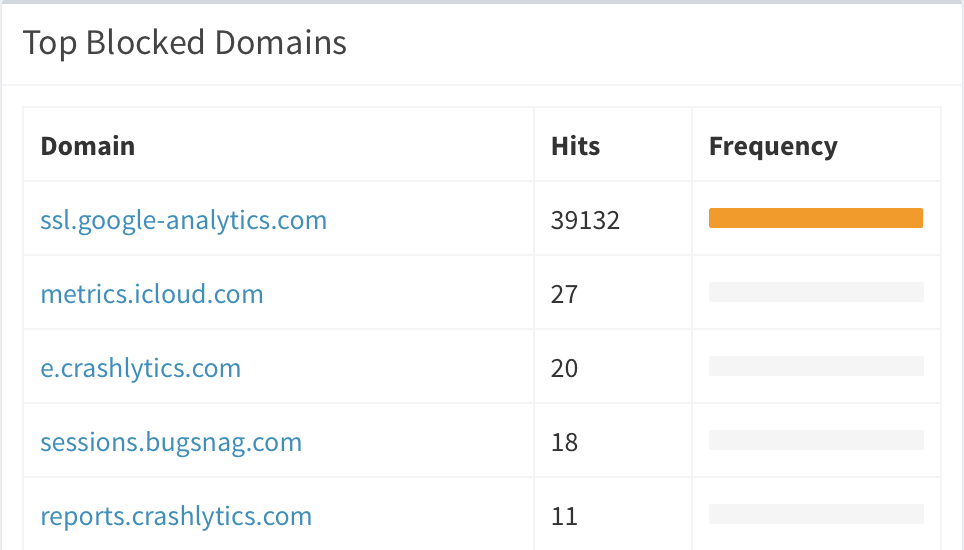
Google analytics requests exploded when my girlfriend connected her Android phone to the network
Bonus: redirecting a DNS resolution
As described in my article How everyone could feed my cat, I needed to redirect the resolution of my feeder to prevent it to communicate with the original server.
I have built a custom API, that is hosted on my server. And to make it work, I have to redirect my feeder requests to my server.
It’s doable, simply by editing the etc/hosts file:
(...)
51.38.185.236 dev.alnpet.com
Then, by restarting the DNS with sudo pihole restartdns; the feeder communicate with my server, and not with theirs.
Going way further
You now have a fully functional ad & tracker blocker from the network side.
If you’re really concerned about privacy, you should look forward of installing your own DNS resolver using unbound
Otherwise, for more security, you should configure DNS over HTTPS with cloudflared,
securing the DNS resolving using a TLS connection, and preventing snooping, monitoring or other types of attacks.
Finally, if you want to make your pi-hole admin interface available from the outside world, you really should consider an HTTPS configuration.
Don’t miss a thing!
Don't miss any of my indie dev stories, app updates, or upcoming creations!
Stay in the loop and be the first to experience my apps, betas and stories of my indie journey.